
 Online Vendors
  US Online Vendors
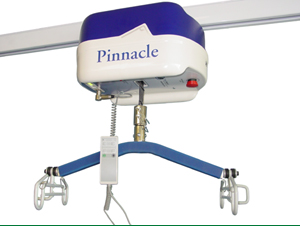
 Ceiling Track Installation - Part 2
Obstacles and Installation Issues
On this page I'm going to try and deal with some obstacles and issues that will cause problems for installations of ceiling lifts. Again the information will be pretty generic and the manufacturer's directions for installation should always be followed for safety.
Doorways
Doorways will always be a problem for track layouts that travel throughout the building. When installing the ceiling track the door header will prevent the track installation from proceeding out of the room or into the next room.
- If you have a permanent lift the only option you have is to have the door header removed. Removing the header will leave an opening above the door about 18" high and the same width as the door. This can be fixed by having a new custom made door mounted the will go to the ceiling or by filling in the area while leaving an opening large enough for the lift and its lifting strap to pass through.
- If you have a portable ceiling lift then the doorway can be dealt with a couple of ways.
- Deal with it the same way as you would a permanent lift as described above.
- The second option is to stop the track at the door header and start it again on the other side of the door. With a portable ceiling lift the user can be moved to the doorway and then using a lanyard and reacher be transferred to the track on the other side.
- There is a third option of lowering the user into a wheelchair or commode at the doorway, transferring the lifting strap to the track on the other side, raising the user back up and continuing along the track. While this works there isn't much point in installing track throughout the house if you have to use a wheelchair or commode and every doorway.
Track Parallel to Joists
When the track needs to run parallel to the joists the weight of the user and the lift will all be on one joist if the ceiling brackets are lagged to the joist. It is always preferable to have the tracking running across the joists to distribute the weight across the several joists. There are a couple of ways to deal with this issue:
- The best way to deal with this is to run a piece of uni-strut across two or more joists, depending on the weight of the user and the size of the joists, from above and run a threaded rod up from the ceiling bracket through the uni-strut. This way the weight will be dispersed properly.
- If the installer needs to lag the ceiling brackets to the ceiling then they have no other option than to install cross braces between the joists at the locations of the ceiling brackets for the lags to screw into. While this option will save money in installation hardware the cost of the labour will likely far exceed any savings. Depending on the weight of the user and the size of the joist this may not be a safe installation.
- If there is no access to the area above the joists there is really only one option. Cut out the ceiling surface from below to expose the joists, install cross members as in option 2, refinish the ceiling and continue with the installation. Again this is labour intensive, and not always save if the user is heavy and the joists are weak.
Drop Ceilings
Drop ceilings are generally very light and can not support the weight of the ceiling lift let alone the weight of the user.
- Somewhere above a drop ceiling there will be a structural ceiling that the installer will have to use to install the track. The ceiling bracket will be on the surface of the drop ceiling in the same way as a normal ceiling but it will have to hang on the structural ceiling above. Using uni-strut the threaded rod will have to be long enough to reach from the ceiling bracket to the structural ceiling. If the distance is more than 10" or 12" then the threaded rod will have to be braced to prevent it from swaying.
- If it is a single length of track that is being installed and not run through the entire house then the track can be mounted on the walls using wall brackets and reinforced tracking, assuming the distance between walls is not too great. Some reinforcement of the walls may be needed where the wall brackets are installed but it should be a fairly simple installation when compared to the other option.